Reading time: less than 1 minute
Telnet is a command line tool designed for the management of remote services via the Command Prompt. Unlike Windows XP and Vista, or Windows 7 It does not have the Telnet client automatically installed. You will need to enable it before you can start to be used. Here's how to enable it by following the steps below.
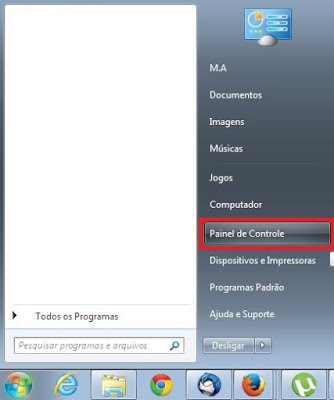
1 – Open the Control Panel.
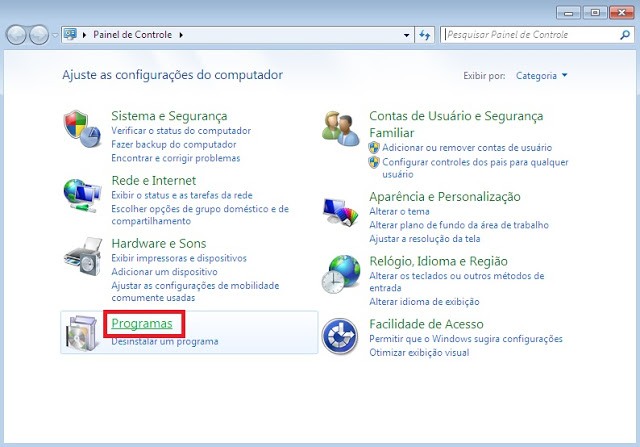
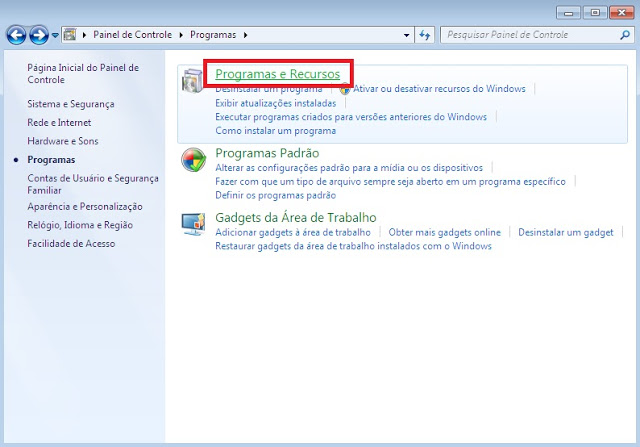
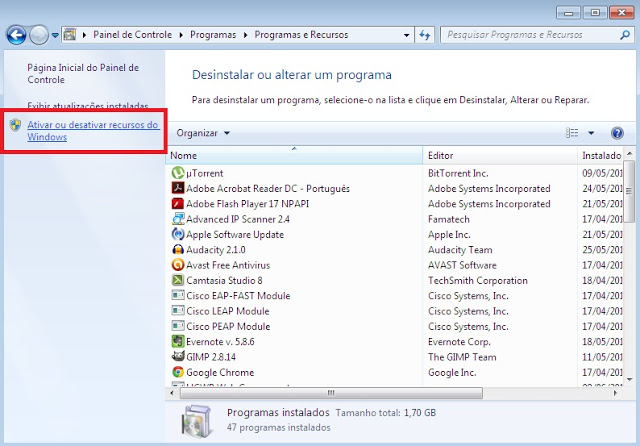
2 – Abra “programs” and then “Programs and Resources”.
3 – Clique no link “Enable and Disable Windows Features”.
4 – Find and mark the entry “Telnet client”.
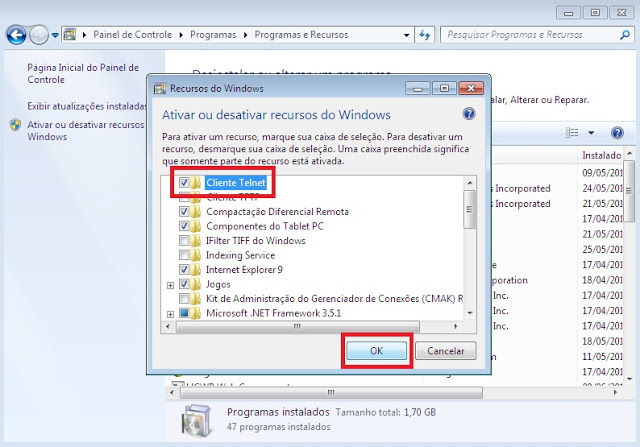
Soon! Now just run the command to open the Telnet and uses it normally.




Permalink
no item 4 this window is blank for me, It does not appear anything
Permalink
Good afternoon,
Checks whether the user has administrator permission; if there is, turn off the computer and try again. If still unable to activate telnet, you can use the Putty program to access. (http://www.putty.org/)